Wood 101
Black Walnut wood is ideal for use in cutting boards for several reasons:
1. Durability: Wood is rated on a "Janka hardness scale" which is a range of measurements that determine how dense a type of wood is and how resistant to dents, dings, and wear that a type of wood will be. Black Walnut has a rating of 1010 lbs, which is a hard and dense wood that can withstand the wear and tear of daily use. This makes it a good choice for cutting boards, which are subject to a lot of slicing and chopping.
2. Resistance to bacteria: Black Walnut is naturally resistant to bacteria and other microorganisms, making it a safer choice for food preparation surfaces.
3. Beauty: Black Walnut has a rich, warm color and attractive grain pattern, making it an attractive addition to any kitchen.
4. Sustainability: Black Walnut is a renewable resource that is sustainably managed, making it an eco-friendly choice for cutting boards.
5. Knife-friendly: Unlike some other types of wood, Black Walnut is relatively soft and won't dull your knives as quickly, making it easier to use for long periods of time.
Overall, the combination of durability, resistance to bacteria, beauty, sustainability, and knife-friendliness make Black Walnut an ideal choice for cutting boards.
Option 1 - CNC carved only
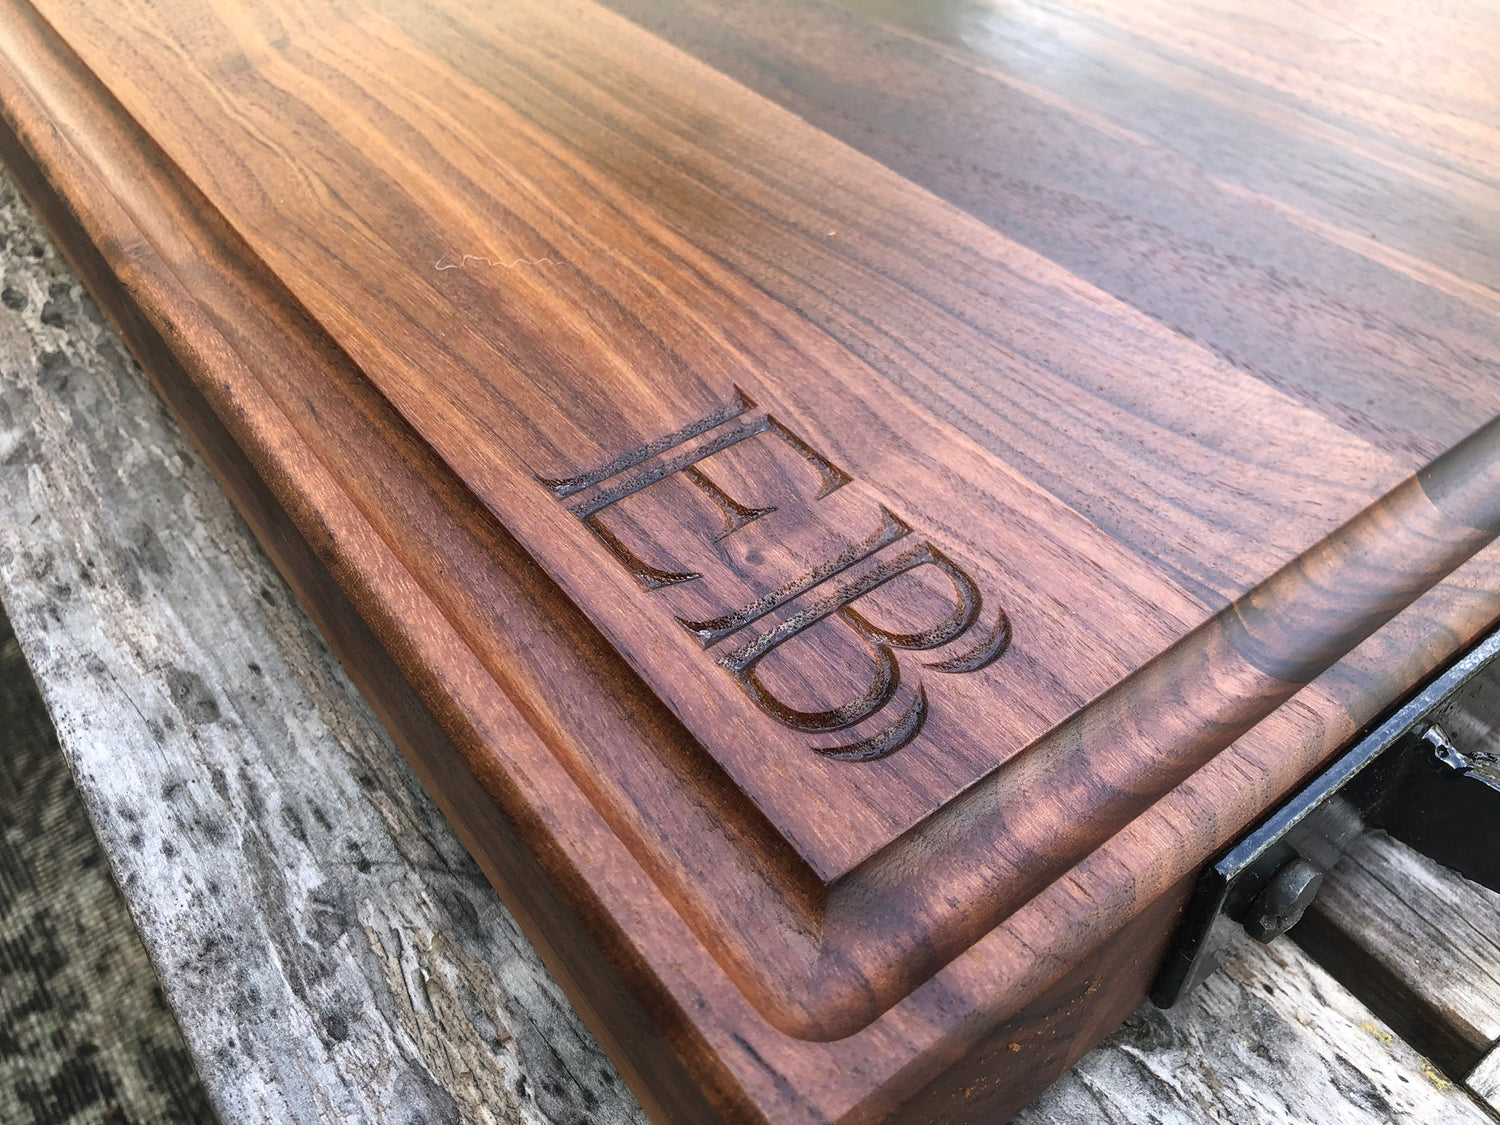
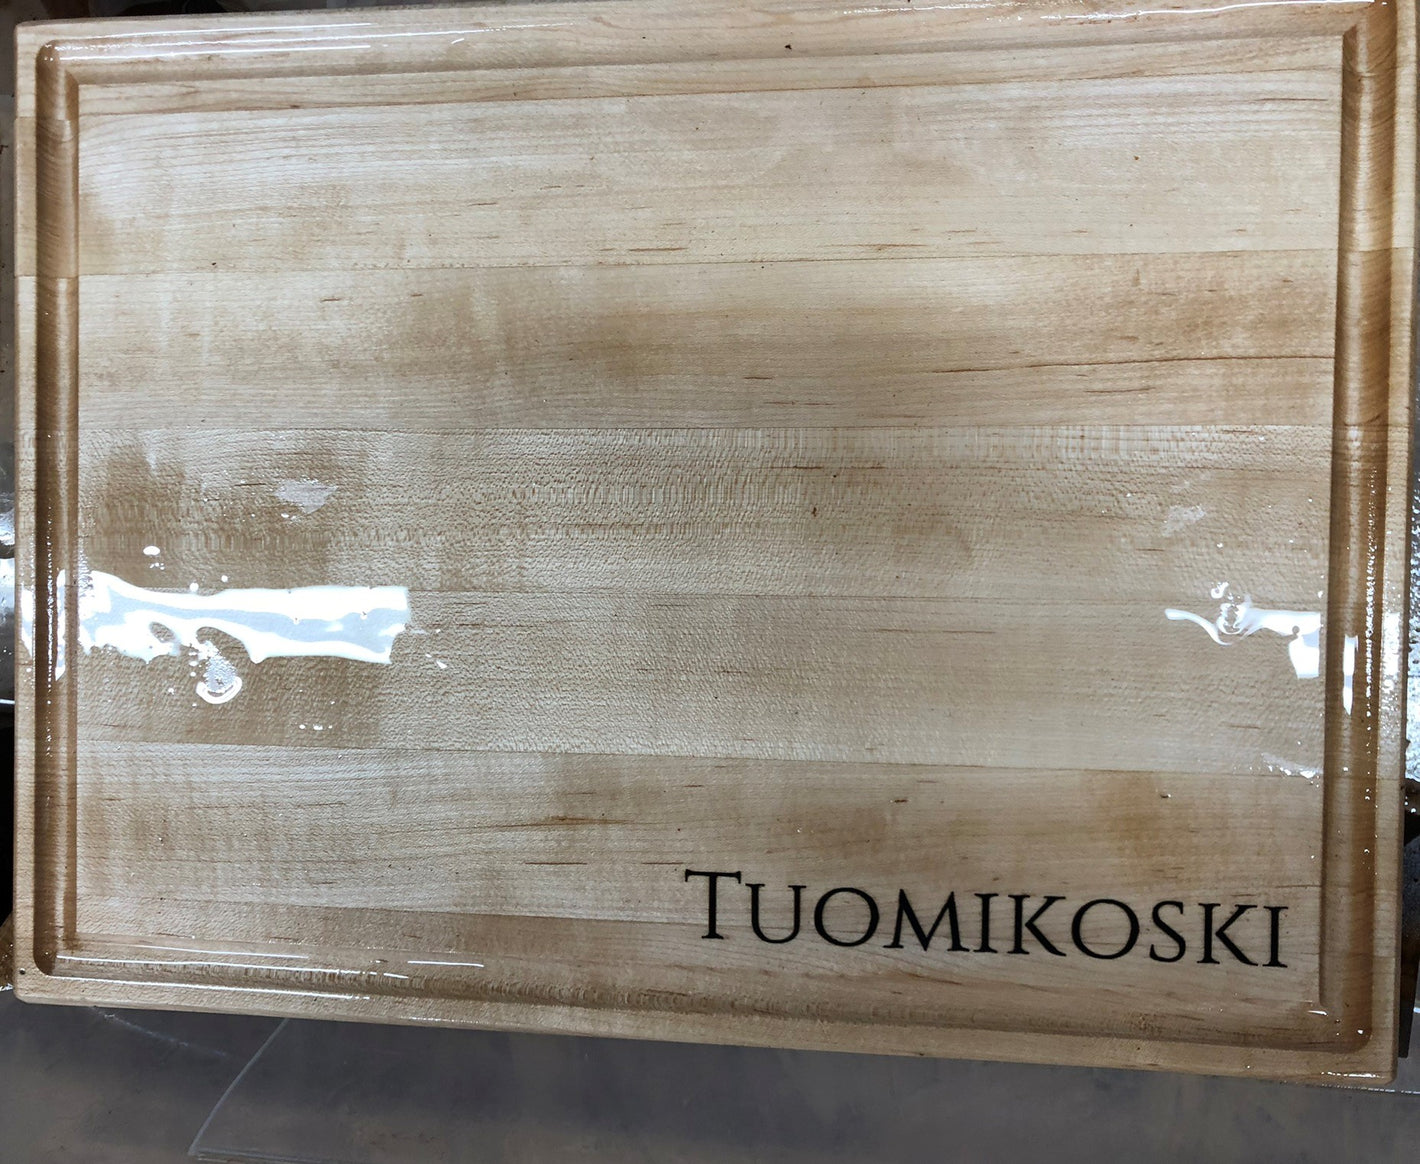
We can customize each board with personalized initials or logo.
If initials or a name are chosen, we have several fonts to choose from.
If a logo is chosen, we would request a copy of the file in .svg format. If the logo is not in .svg format, we can create one for you. However, we cannot guarantee that the details of the logo will look identical. Before any carving takes place, a confirmation email will be sent to ensure both parties are on the same page.

Option 2 - CNC carved + Epoxy Fill
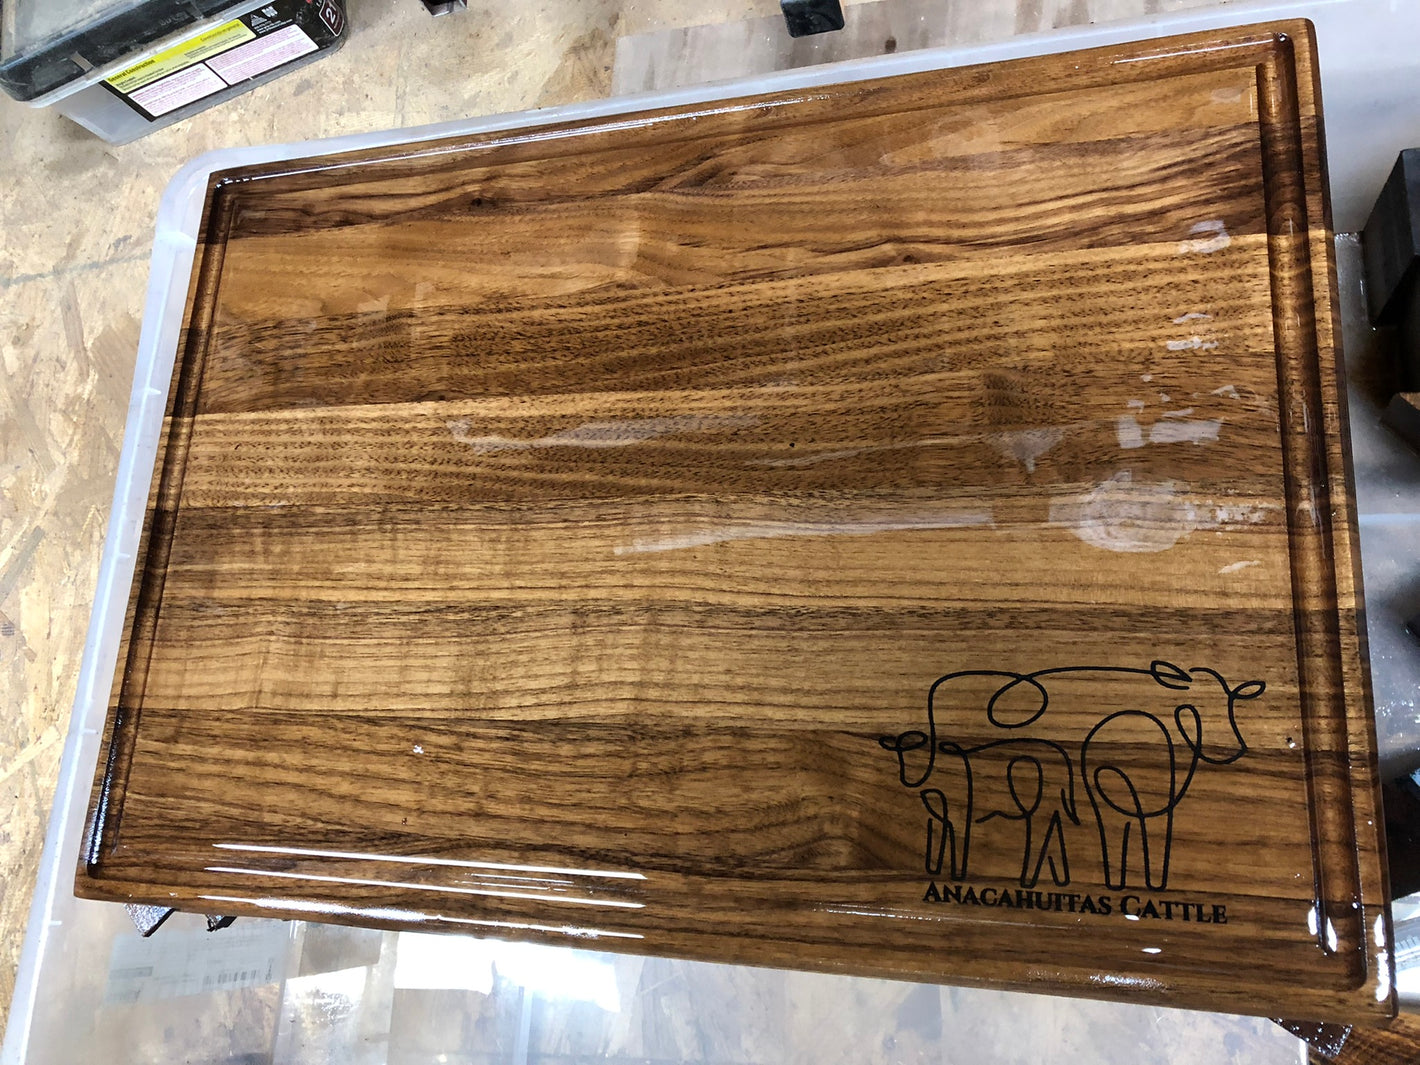
Once the Initials / logo are CNC carved, we can fill them with Black Epoxy. Epoxy has a curation process that hardens once it is complete. The fully cured epoxy is food contact safe (FDA Compliant).
Build Workflow
-
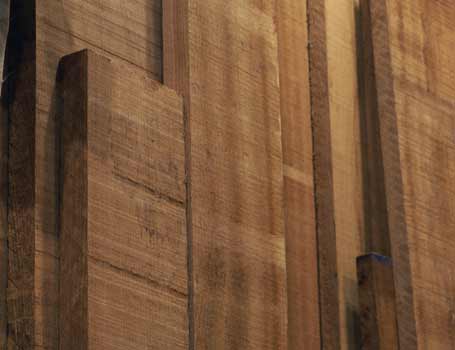
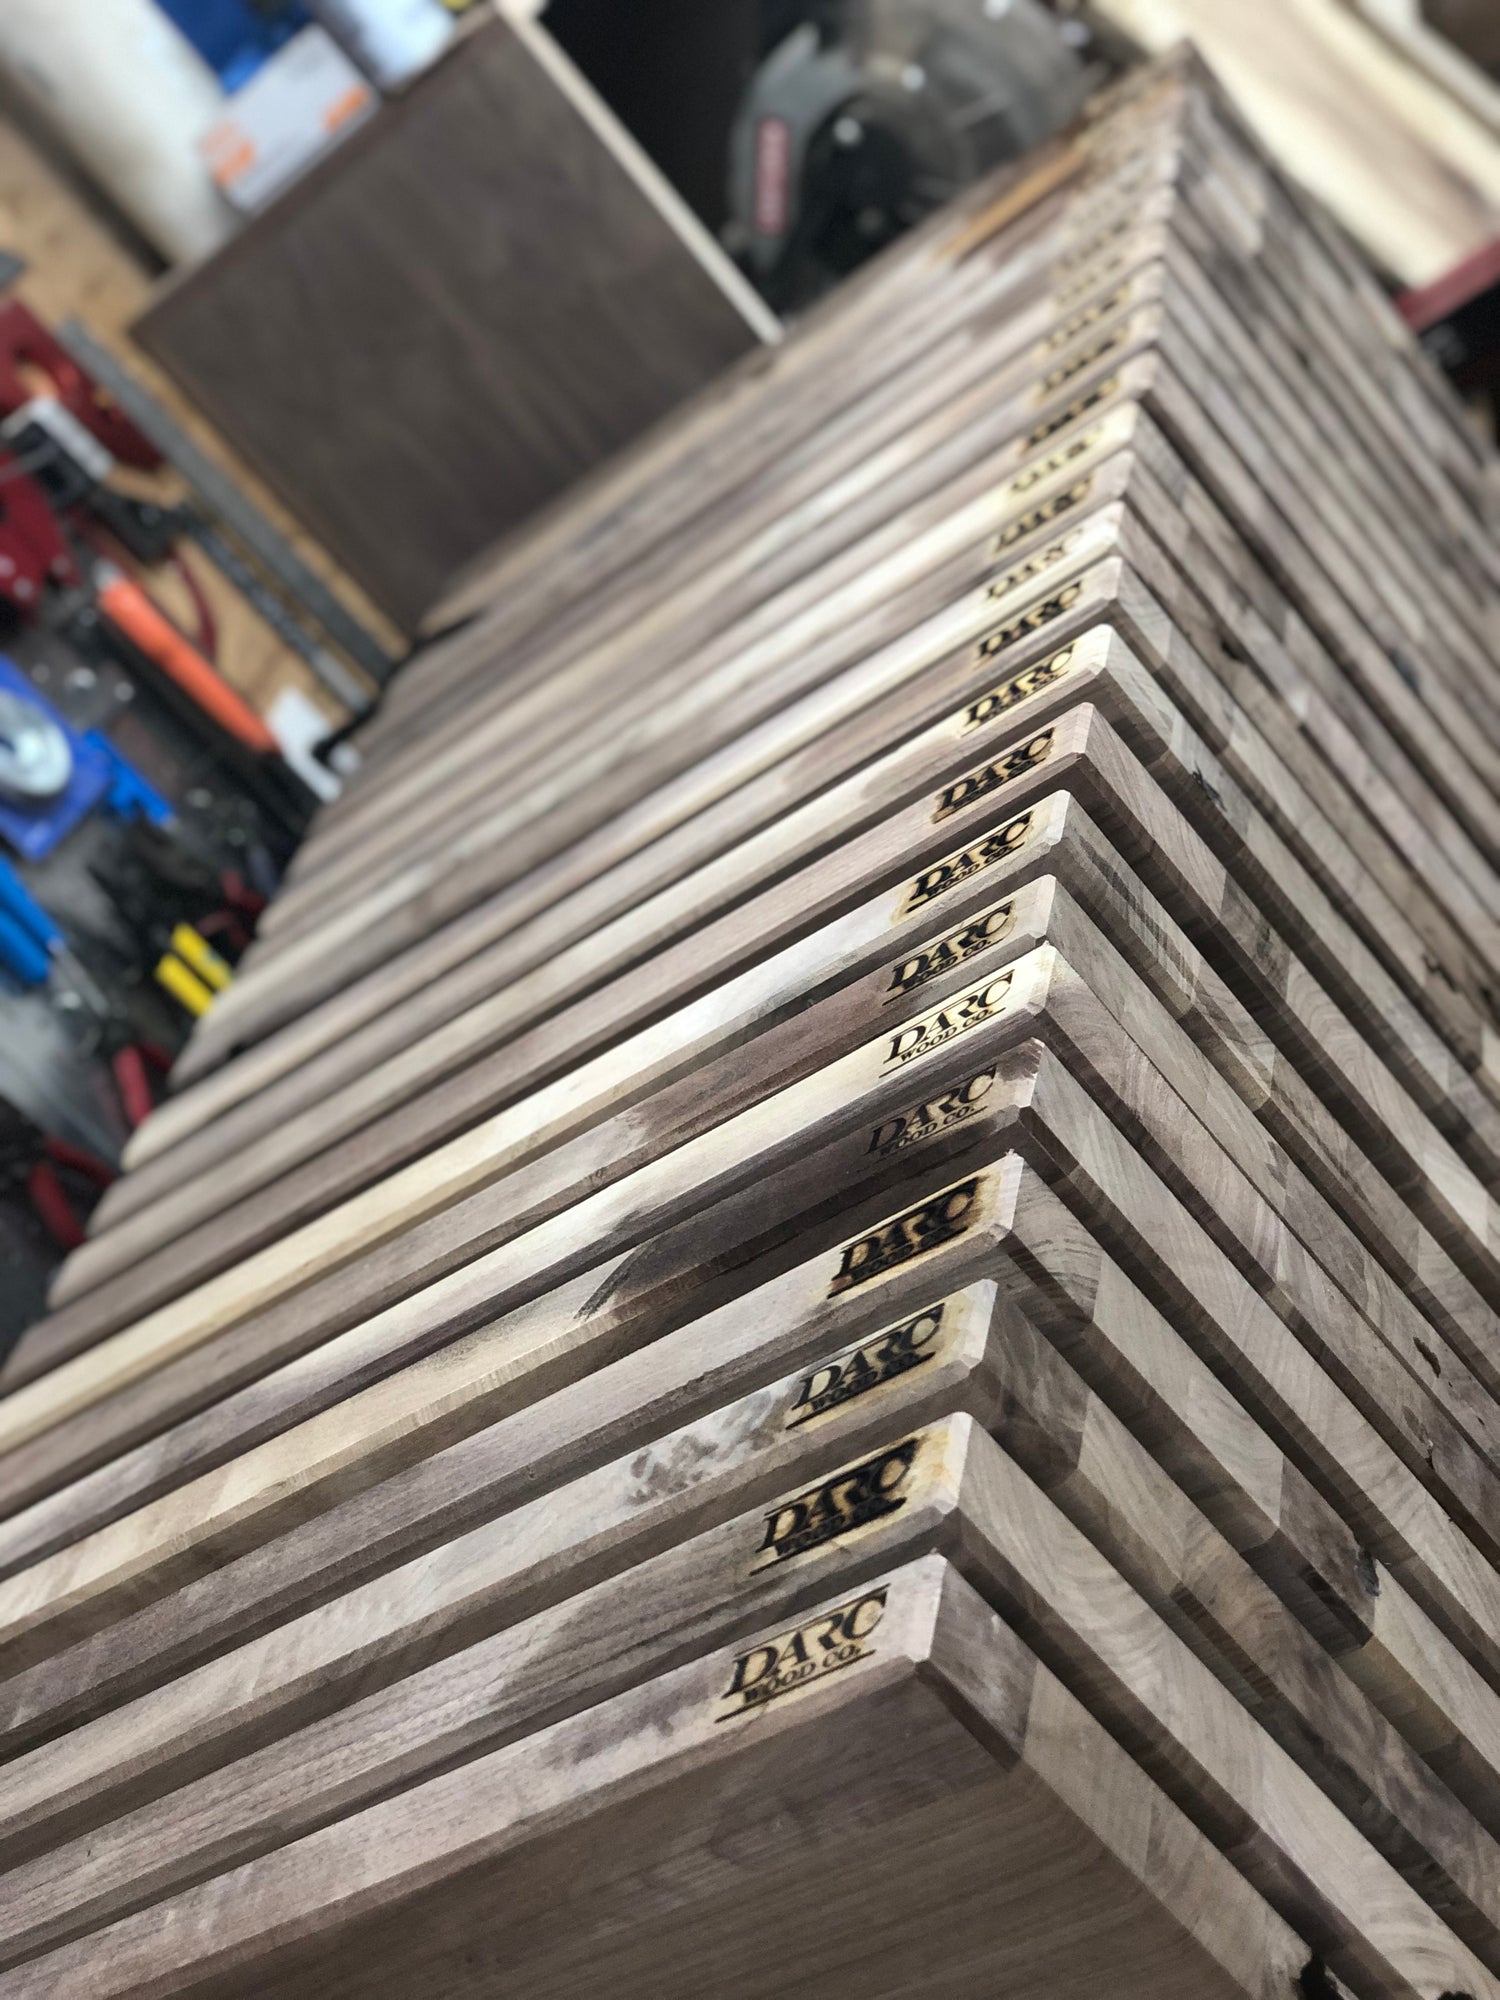
1.) Raw material selection. All wood selections are individually chosen maximizing the wood grain consistency and rich finish.
-
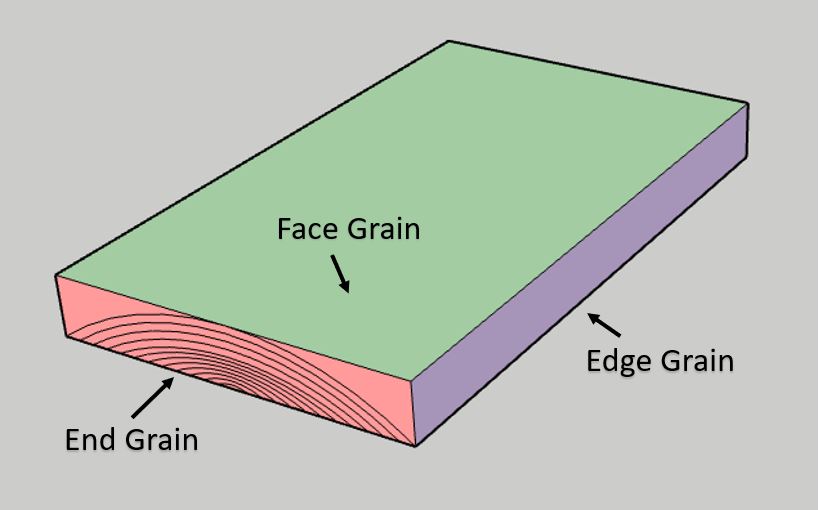
2.) Definition of face grain, edge grain and end grain.
-
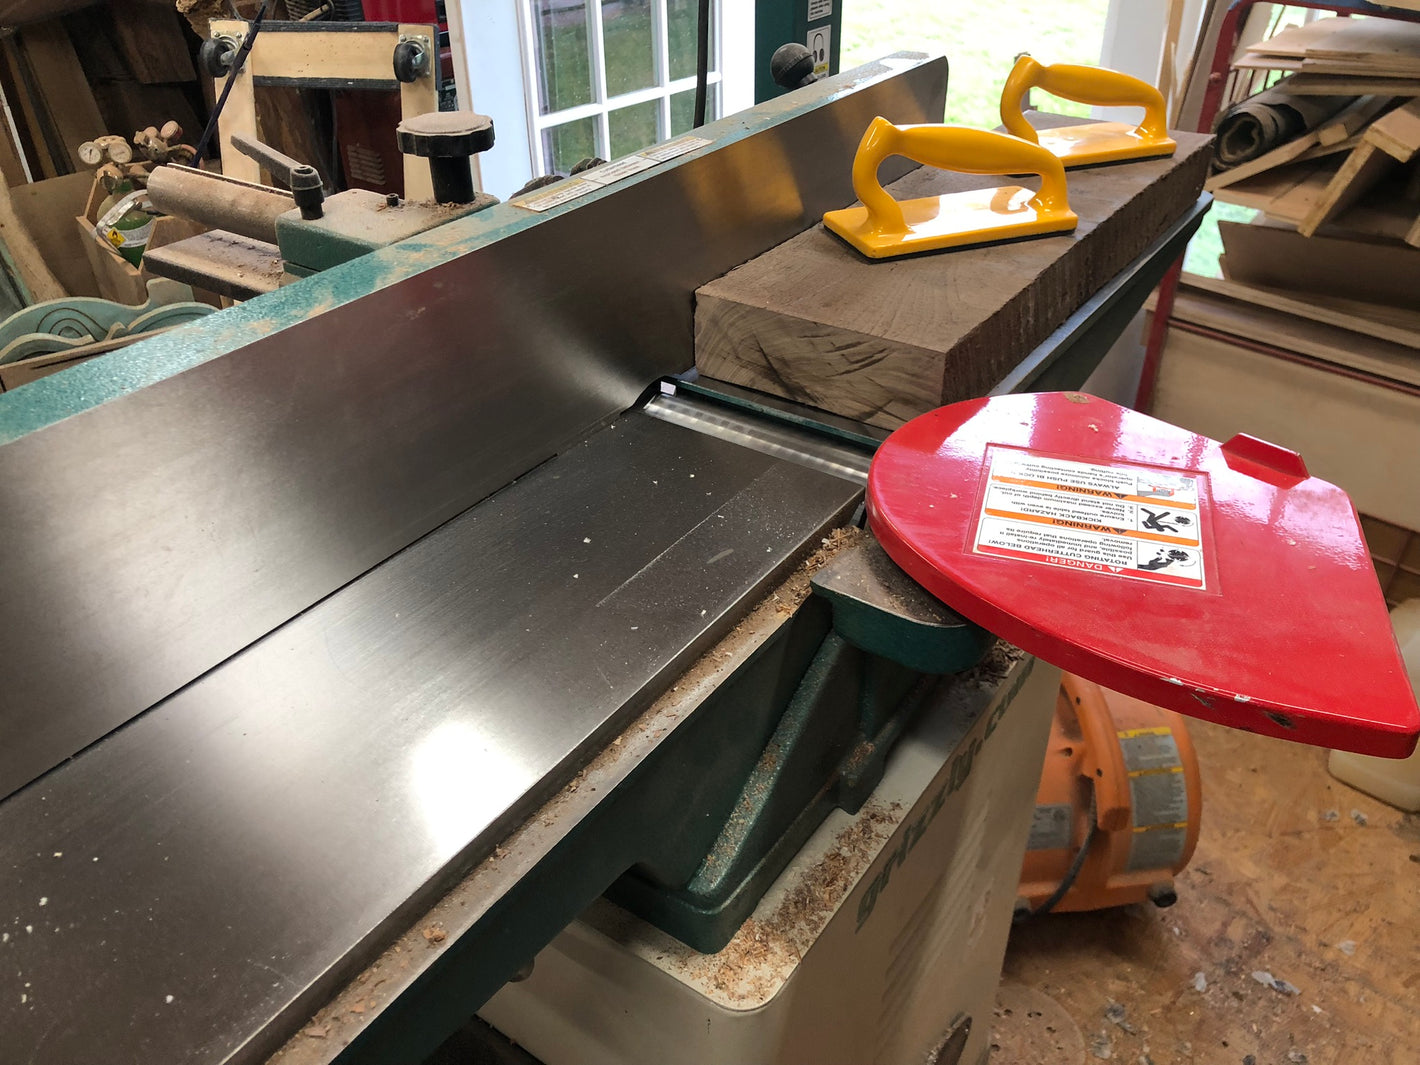
3.) Run one side of the face grain through a Jointer to flatten the surface.
-

4.) Once the face grain is fully surfaced, flip the slab of wood and run it through a Planner to surface the opposite side to be fully parallel to the first Face Grain side.
-
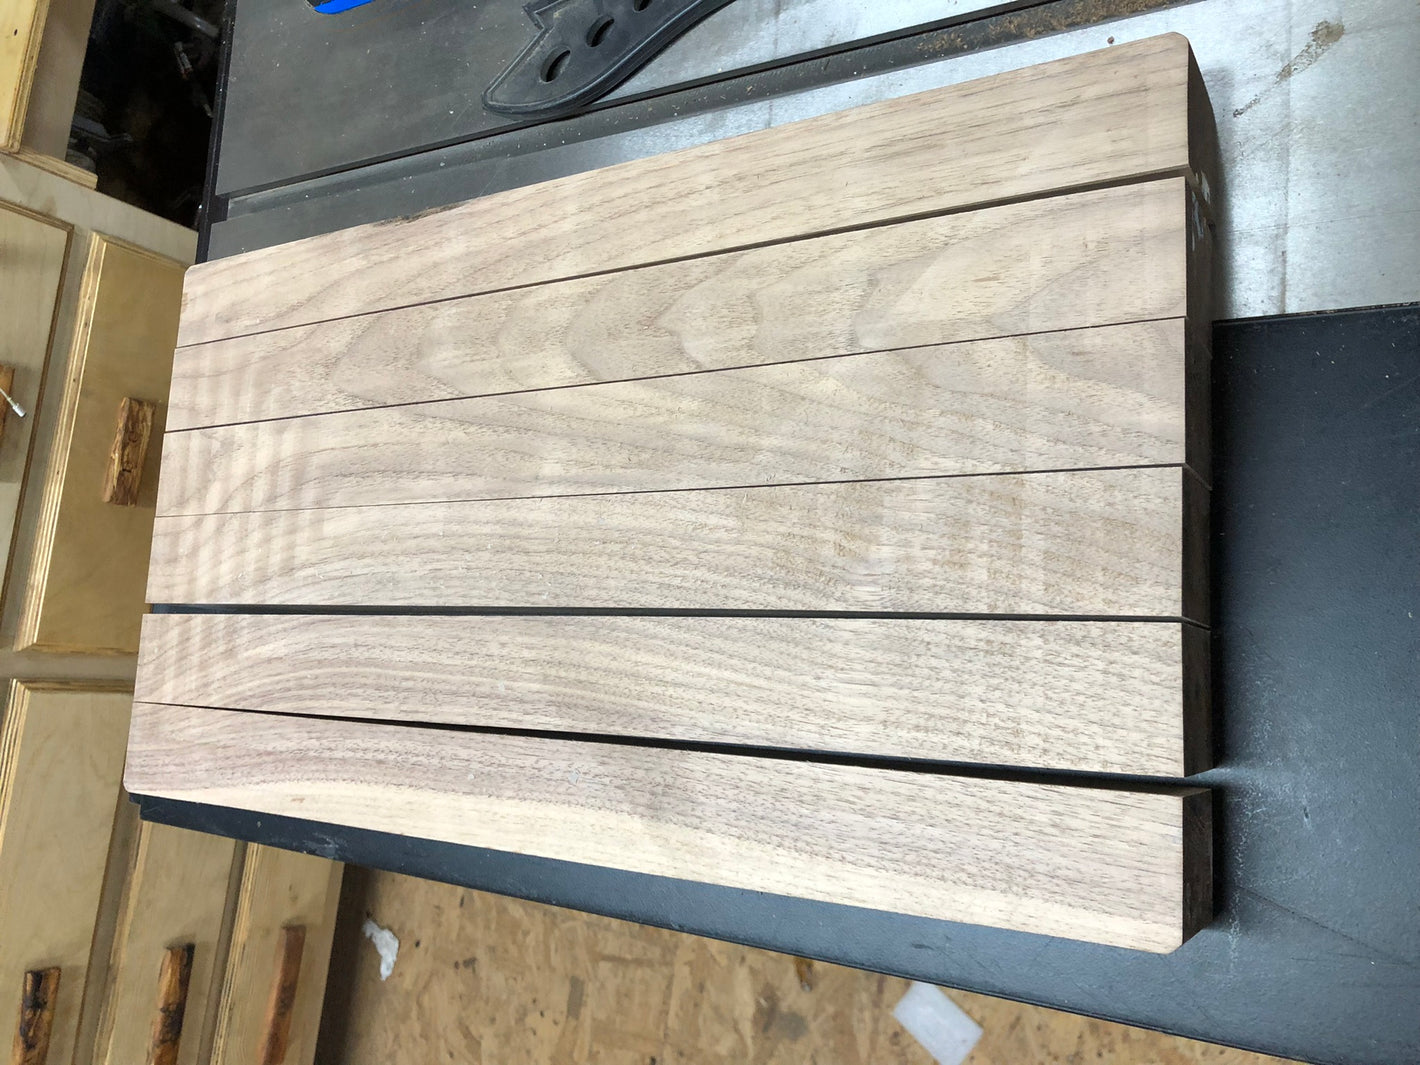
5.) Once both top and bottom face grain sides are fully flat/surfaced, then you can proceed with cutting sections to the desired width. This will end up being an approximate thickness of your board.
-
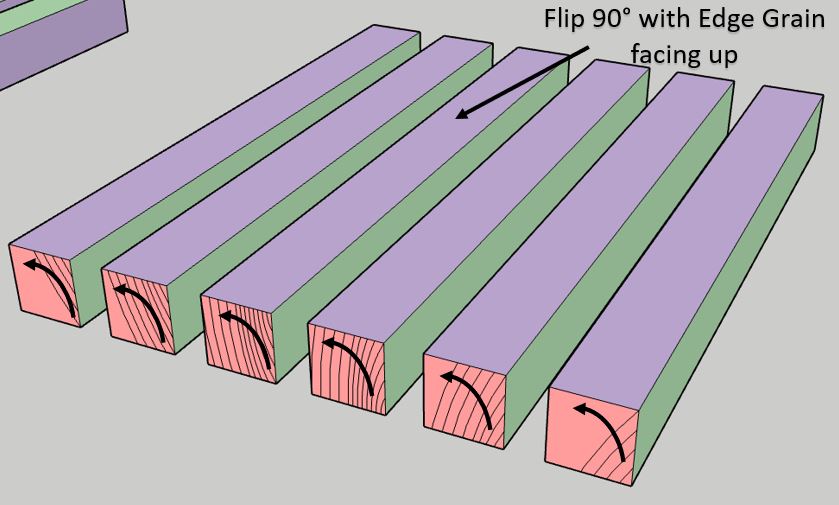
6.) Now, you can proceed with flipping each block 90 degrees to have the edge grain facing up.
-

6.) Now, you can flip every other block, upside down to alternate the direction of the end grain direction. This will help in stabilizing the flatness of your cutting board once glued over time.
-
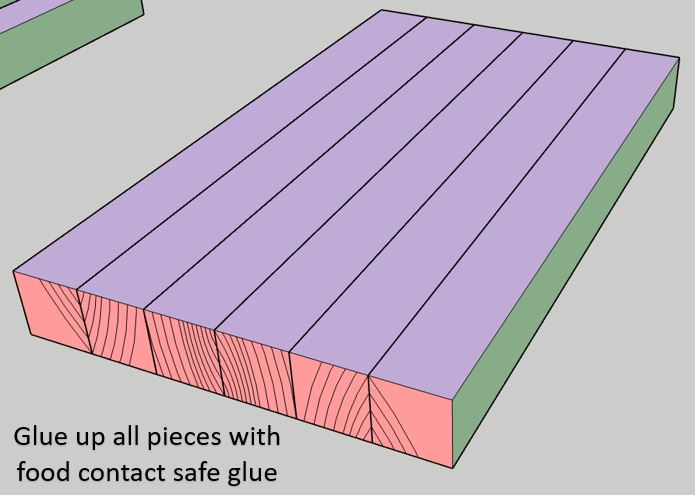
7.) Once all blocks have been flipped and turned to the desired final orientantion, you can proceed with gluing up and clamping.
-
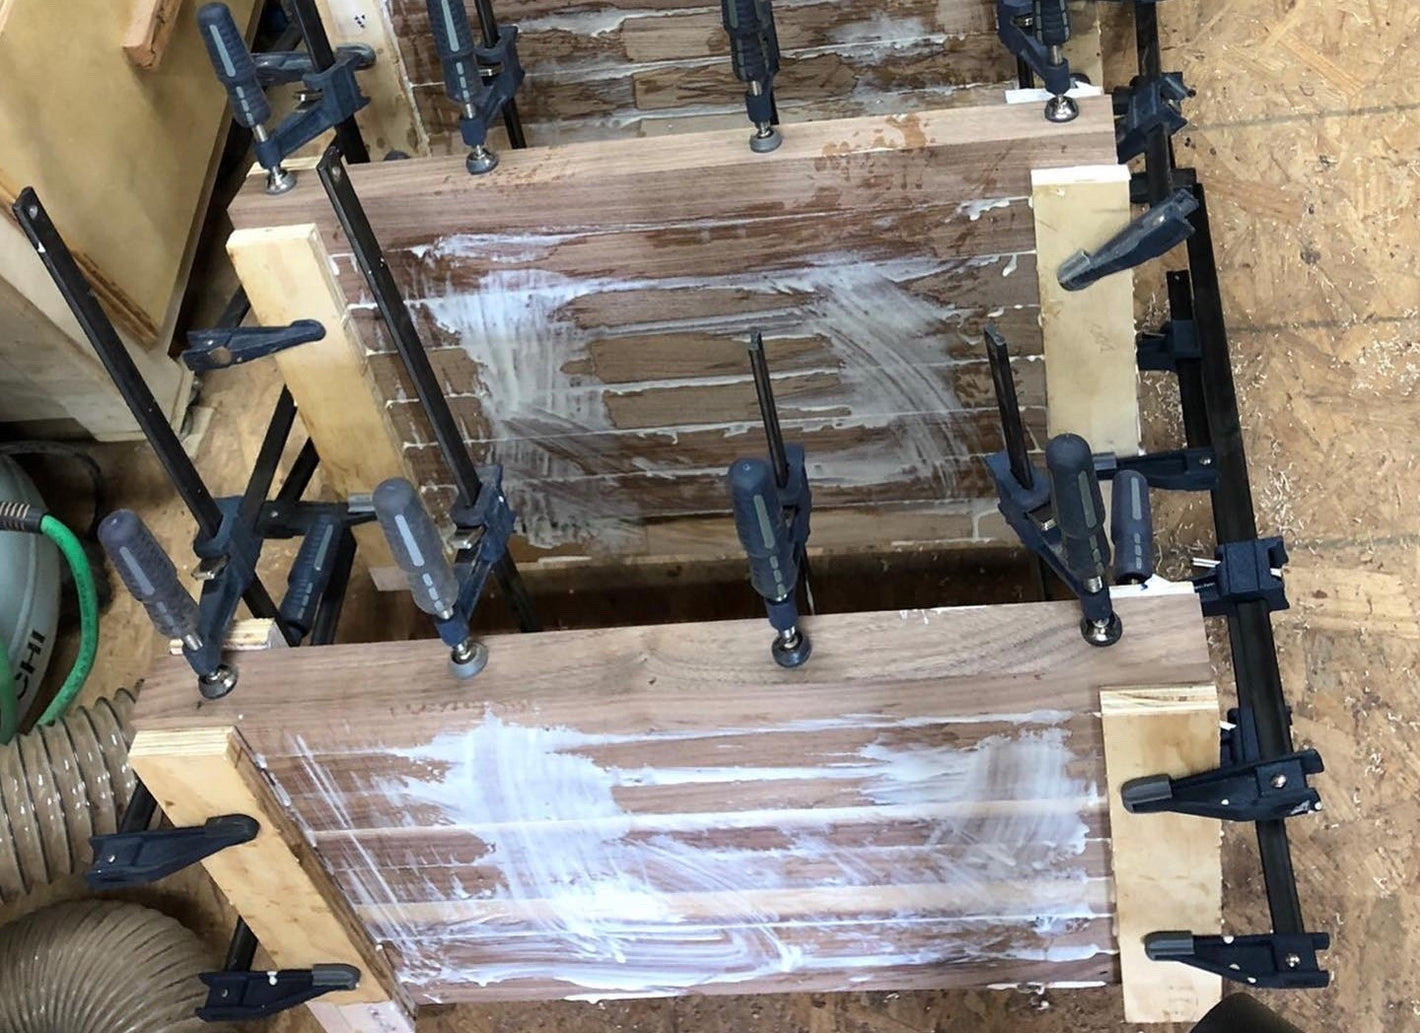
7.) Board glued and clamped.
-
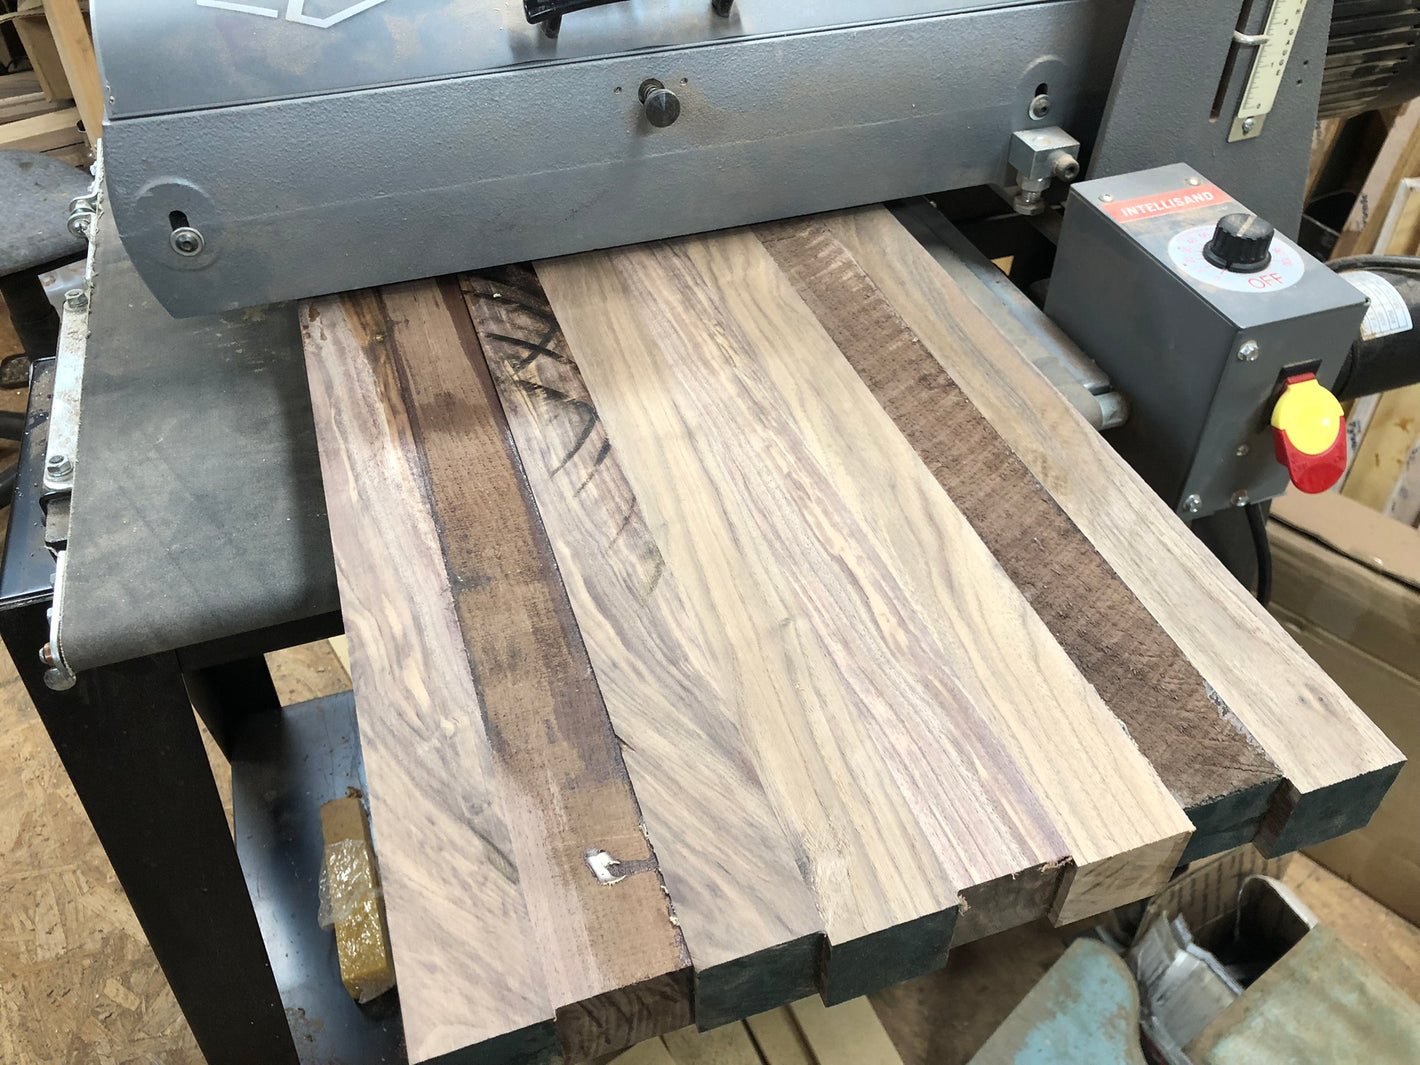
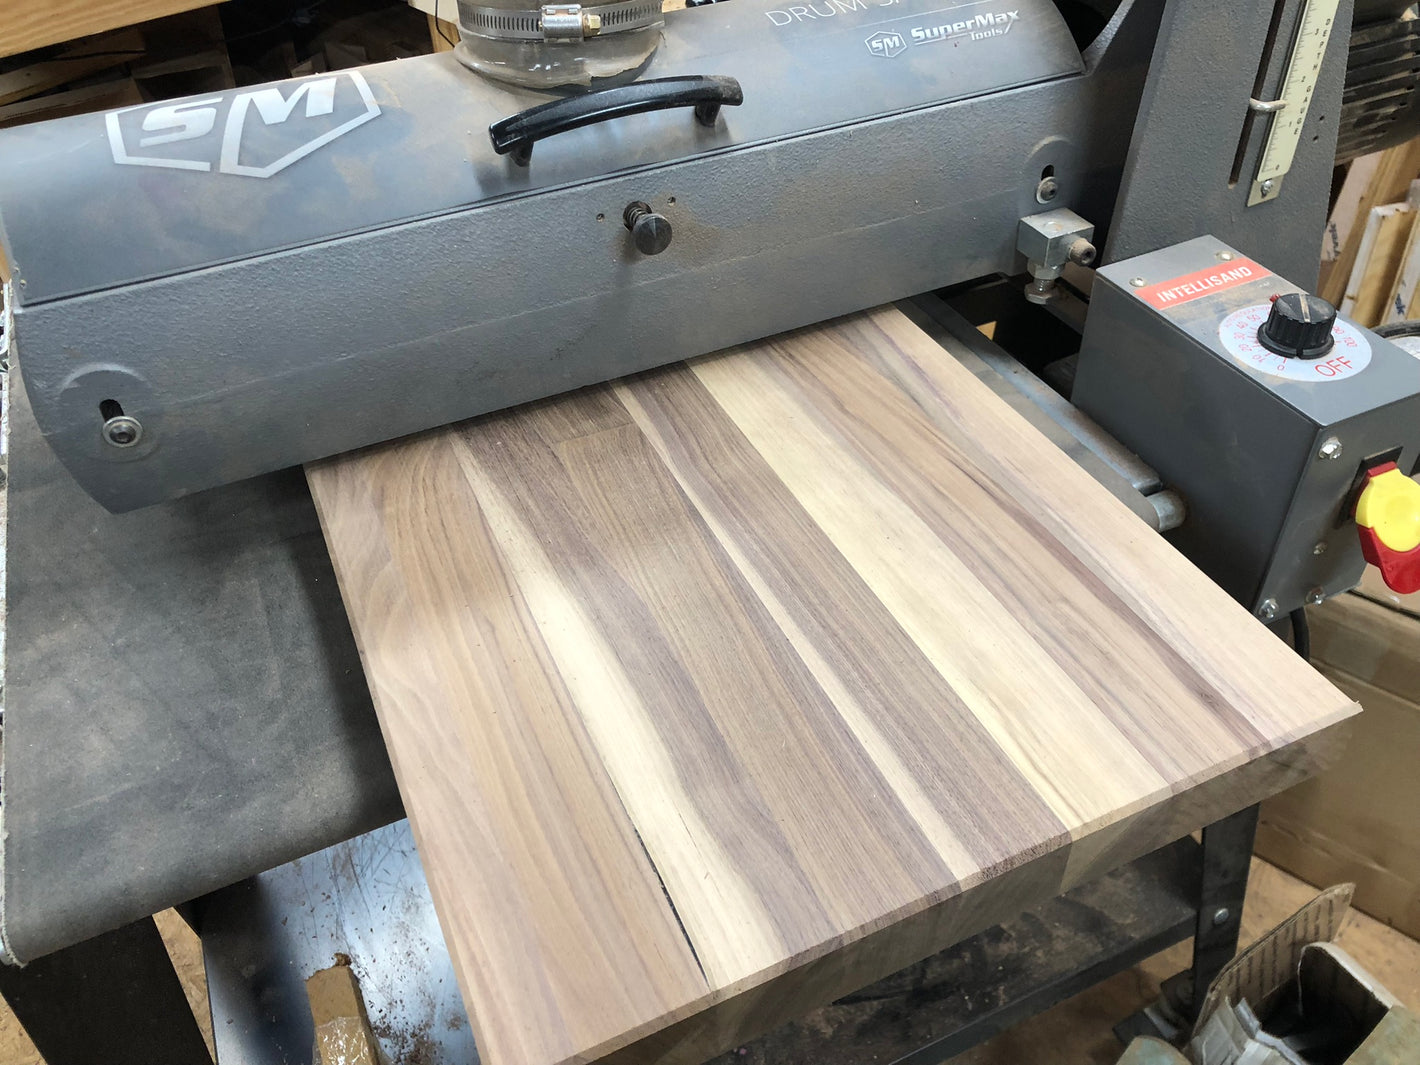
8.) After 24 hours of glue curing time, we unclamp the boards and run these through drum sander to re-flatten.
-
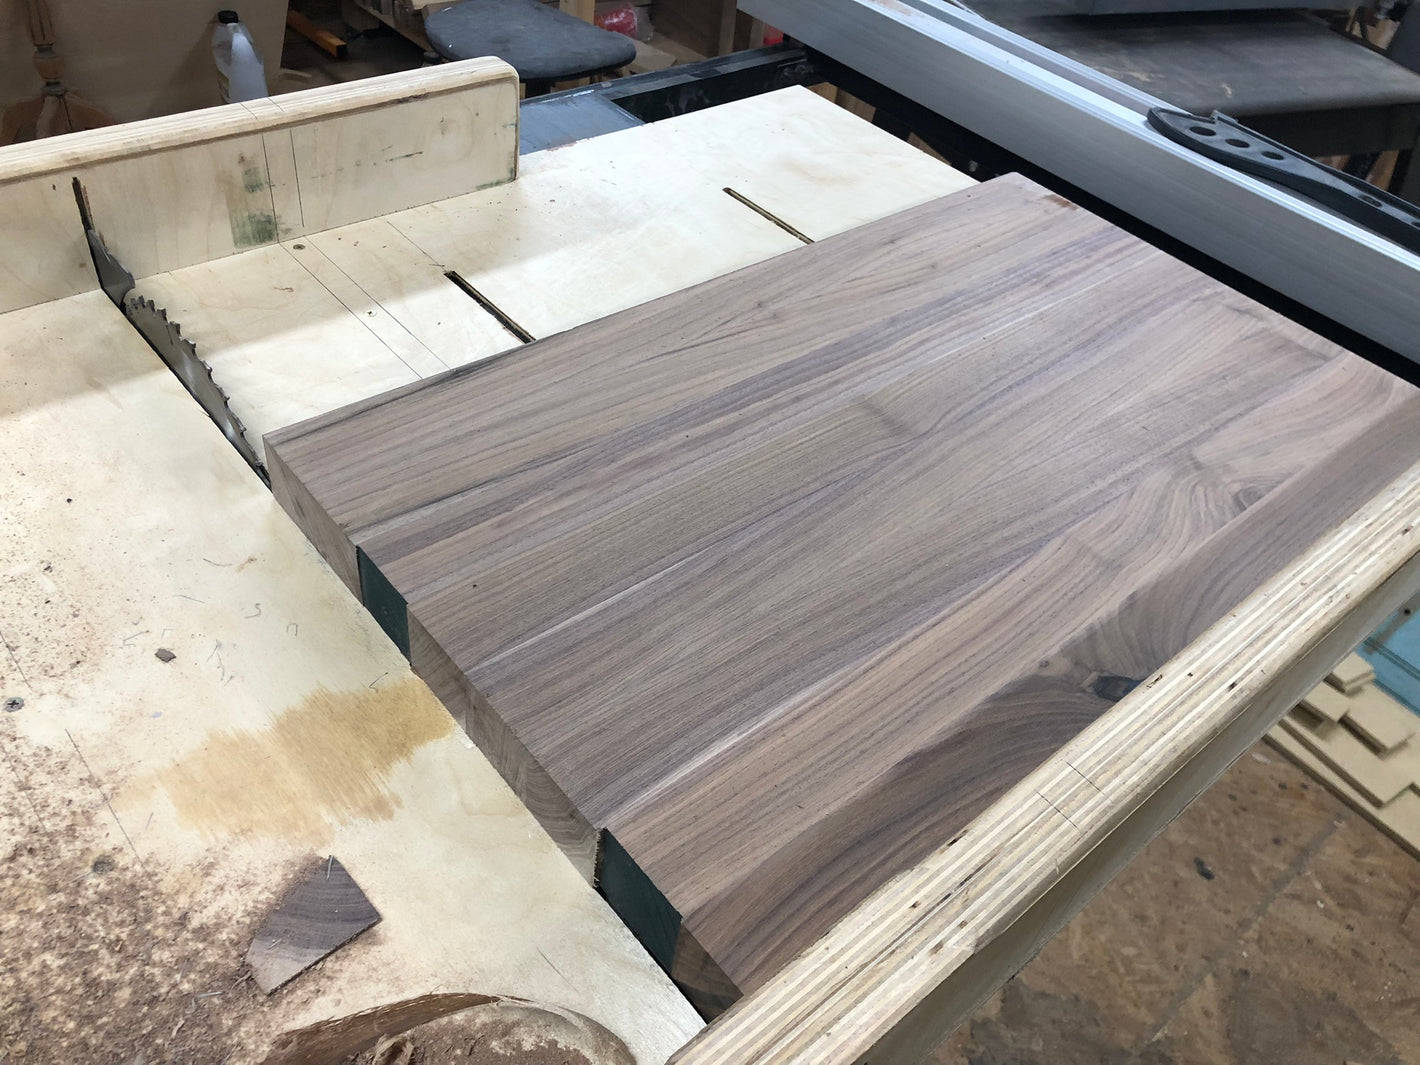
9.) Once a rough surfacing is complete in the drum sander, then we proceed with cutting all 4 sides square using a cutting sled jig.
-
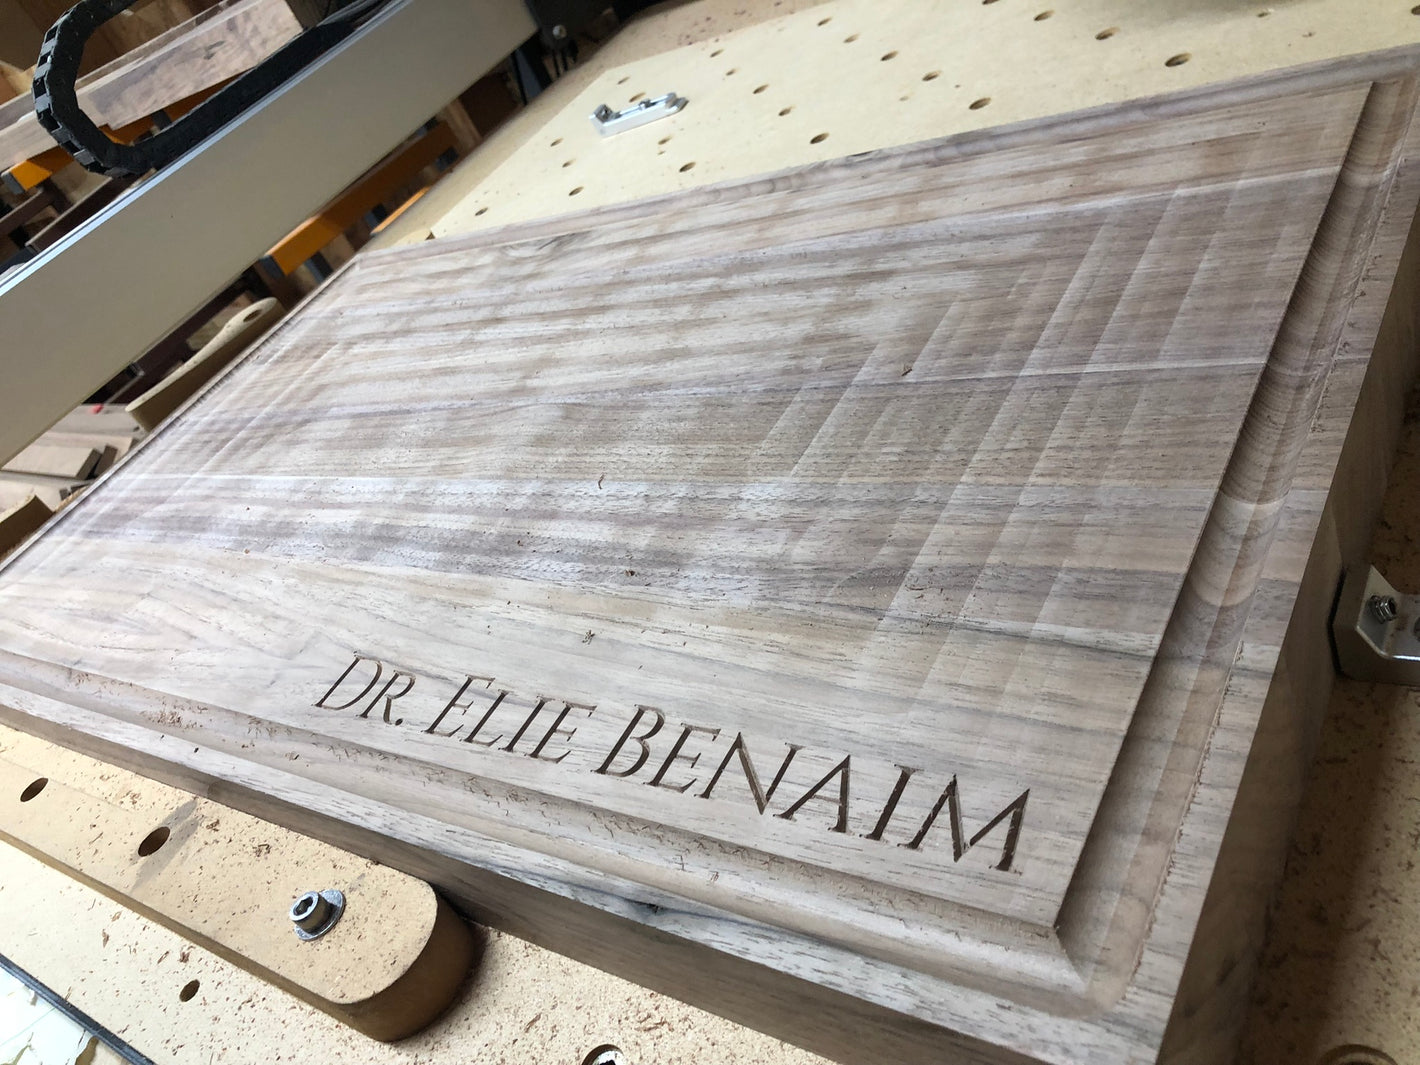
10.) The board is then loaded on to the CNC where it will get surfaced once again to a precision of 0.001", a juice groove will be added, and a logo or initials will be carved.
-
11.) Once complete, the board is removed from the CNC, flipped upside down, and run through a drum sander to surface the bottom part of the board and be completely parallel with the top.
-
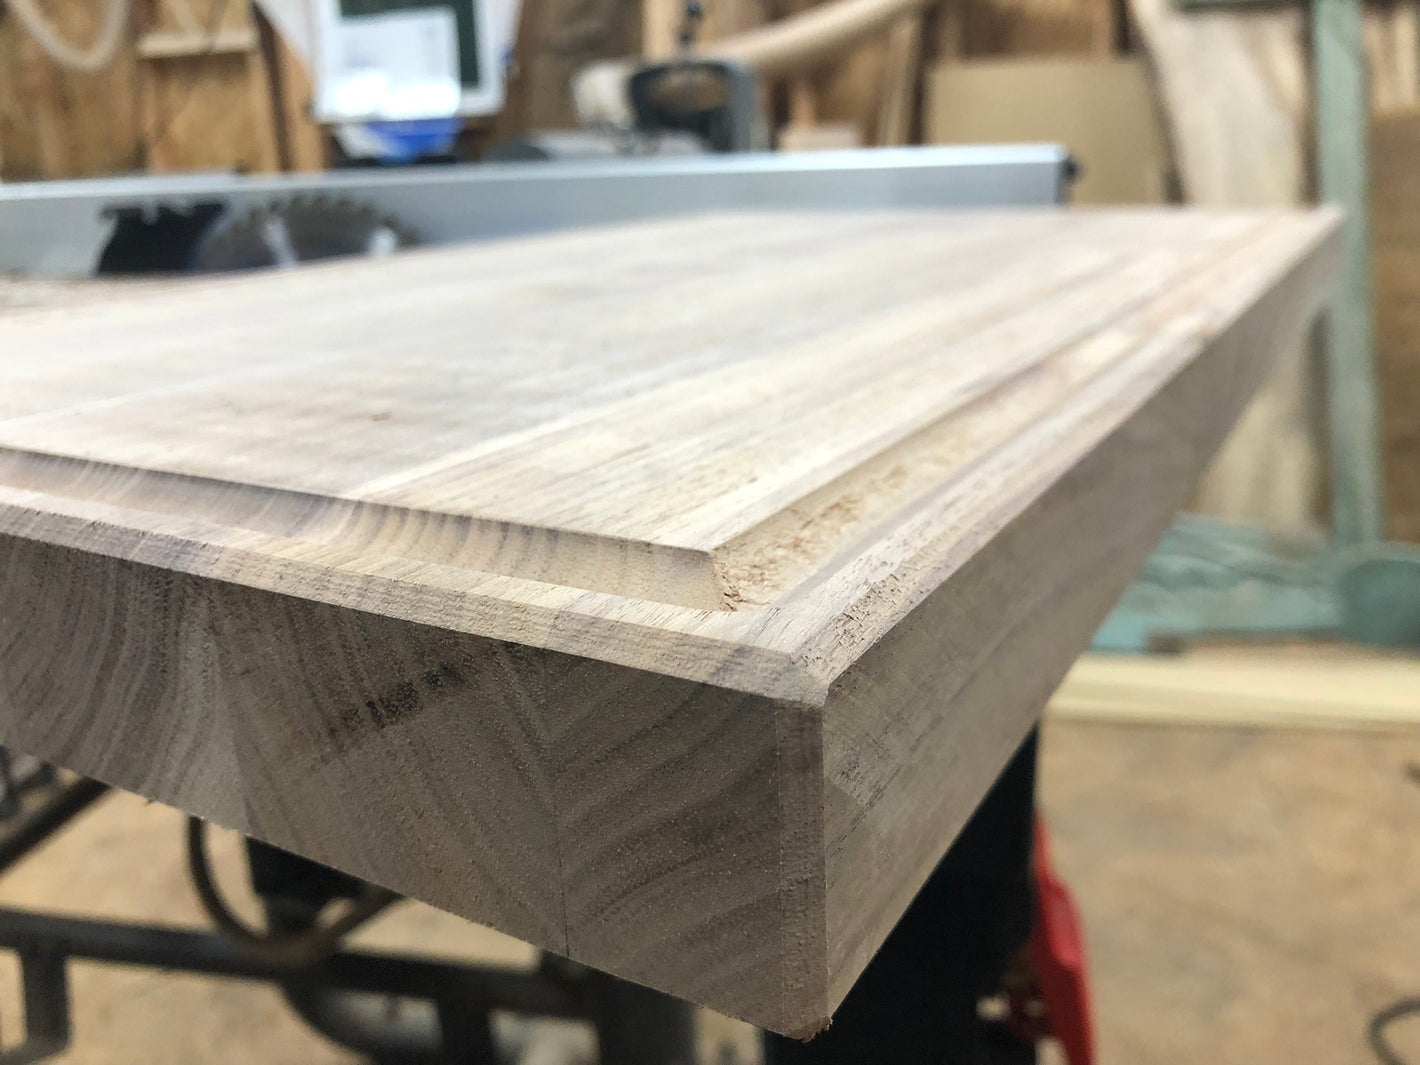
12.) A bevel is added to all edges of the board to remove any sharp corners/edges.
-
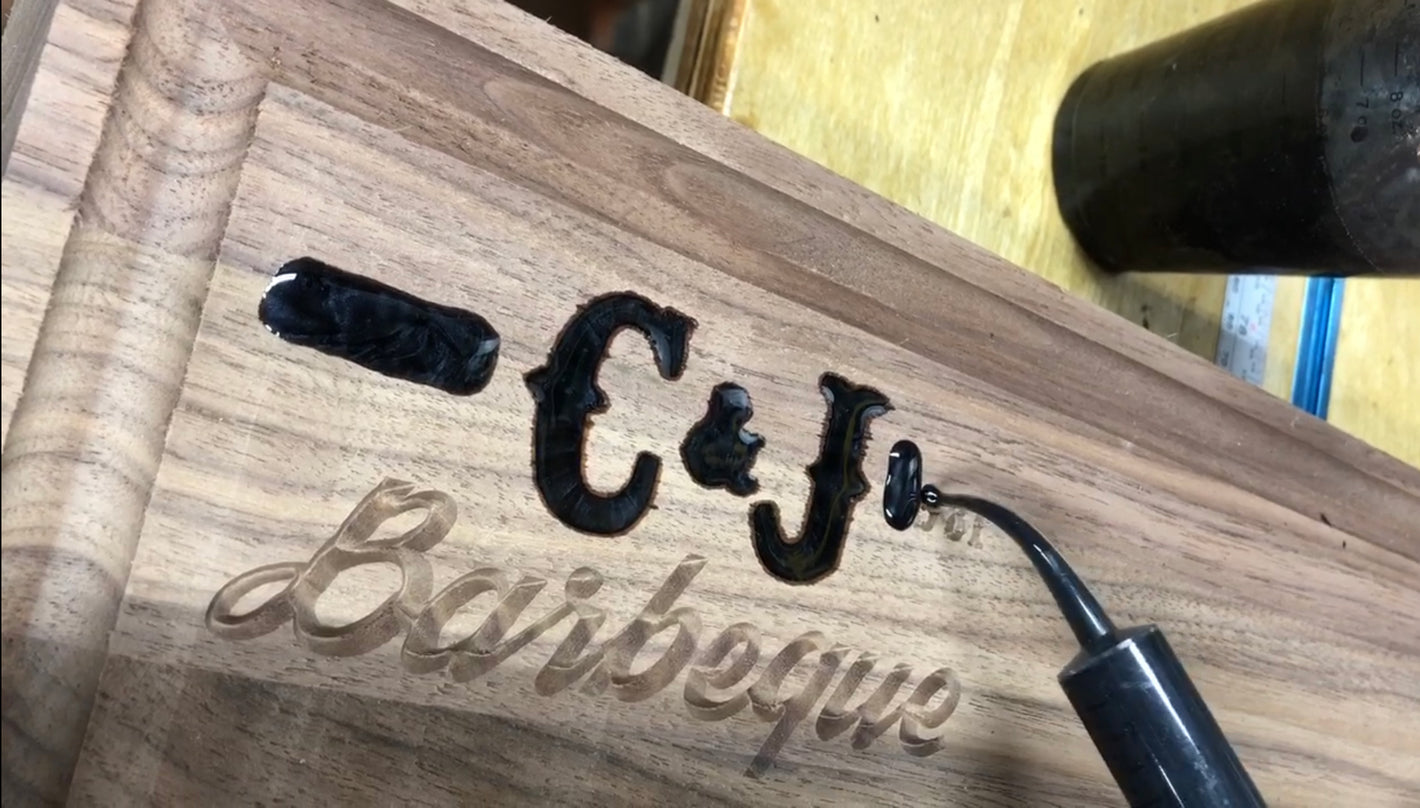
13.) If the client requests epoxy, then the logo/initials will get filled with colored epoxy.
-
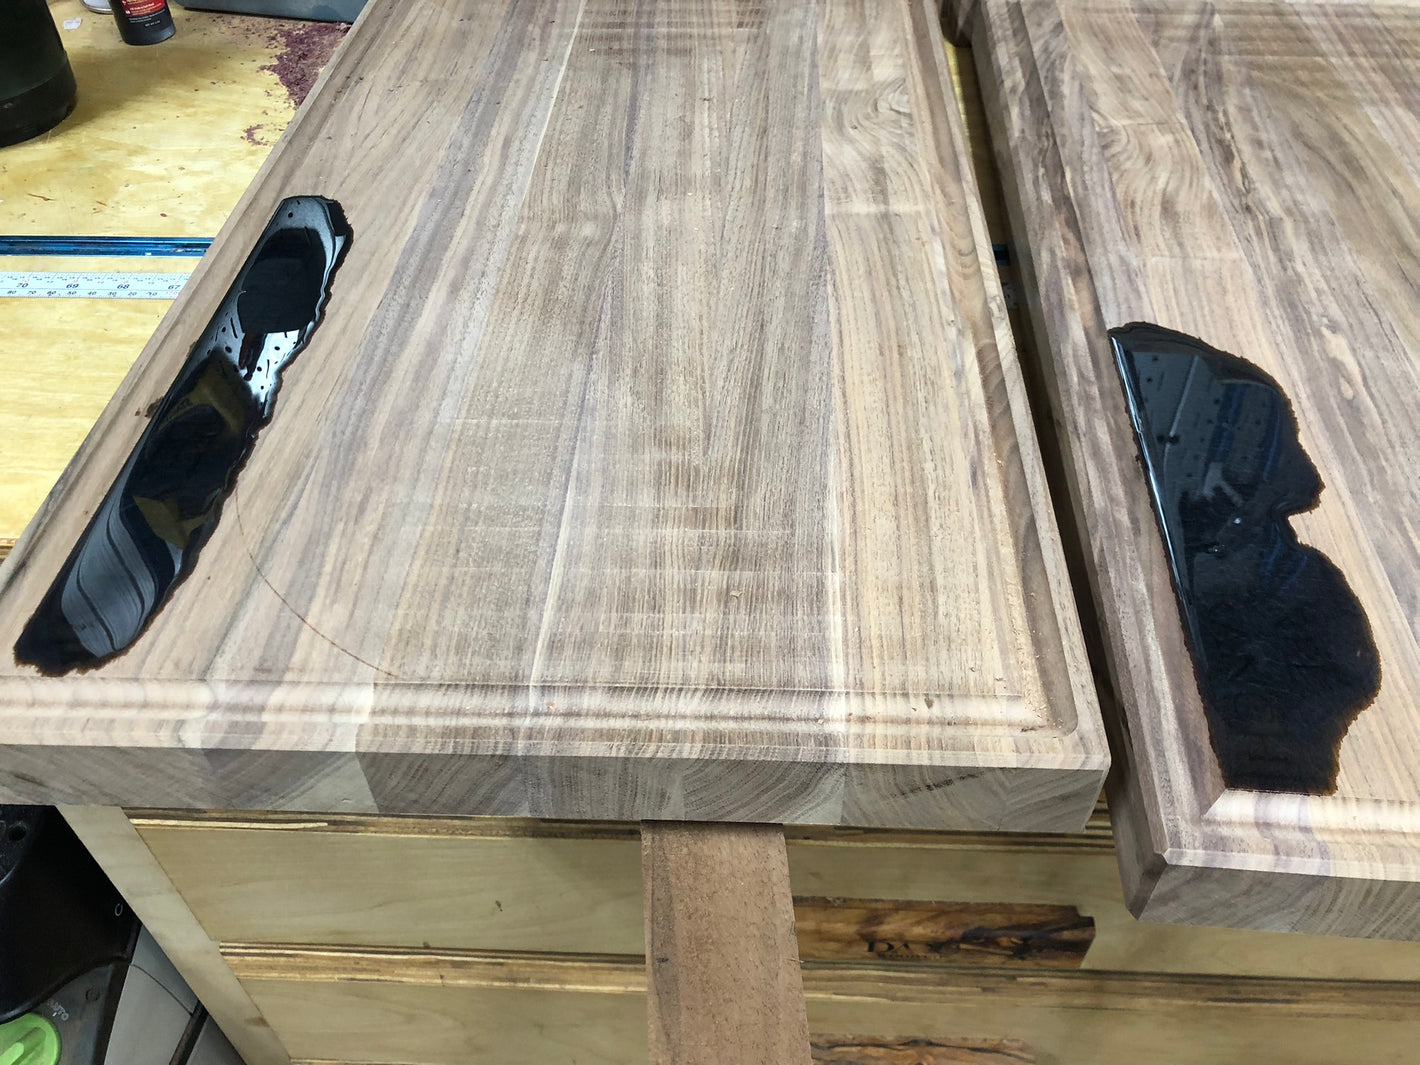
14.) Once the epoxy is fully cured for a minimum of 48 hours, the board goes through multiple levels of sanding and "water popping" to ensure smoothness.
-
15.) Once the board has been sanded, water popped, sanded and so on, for 3 different levels of grit, the board is then sealed with multiple layers of all natural mineral oil. This seals all the pores of the wood and soaks in to prevent bacteria growth.
-
16.) Once mineral oil has been applied, a mix of Butcher block conditioner is applied to add a layer of natural wax mix with mineral oil, followed by a final layer of cutting board wax.
-
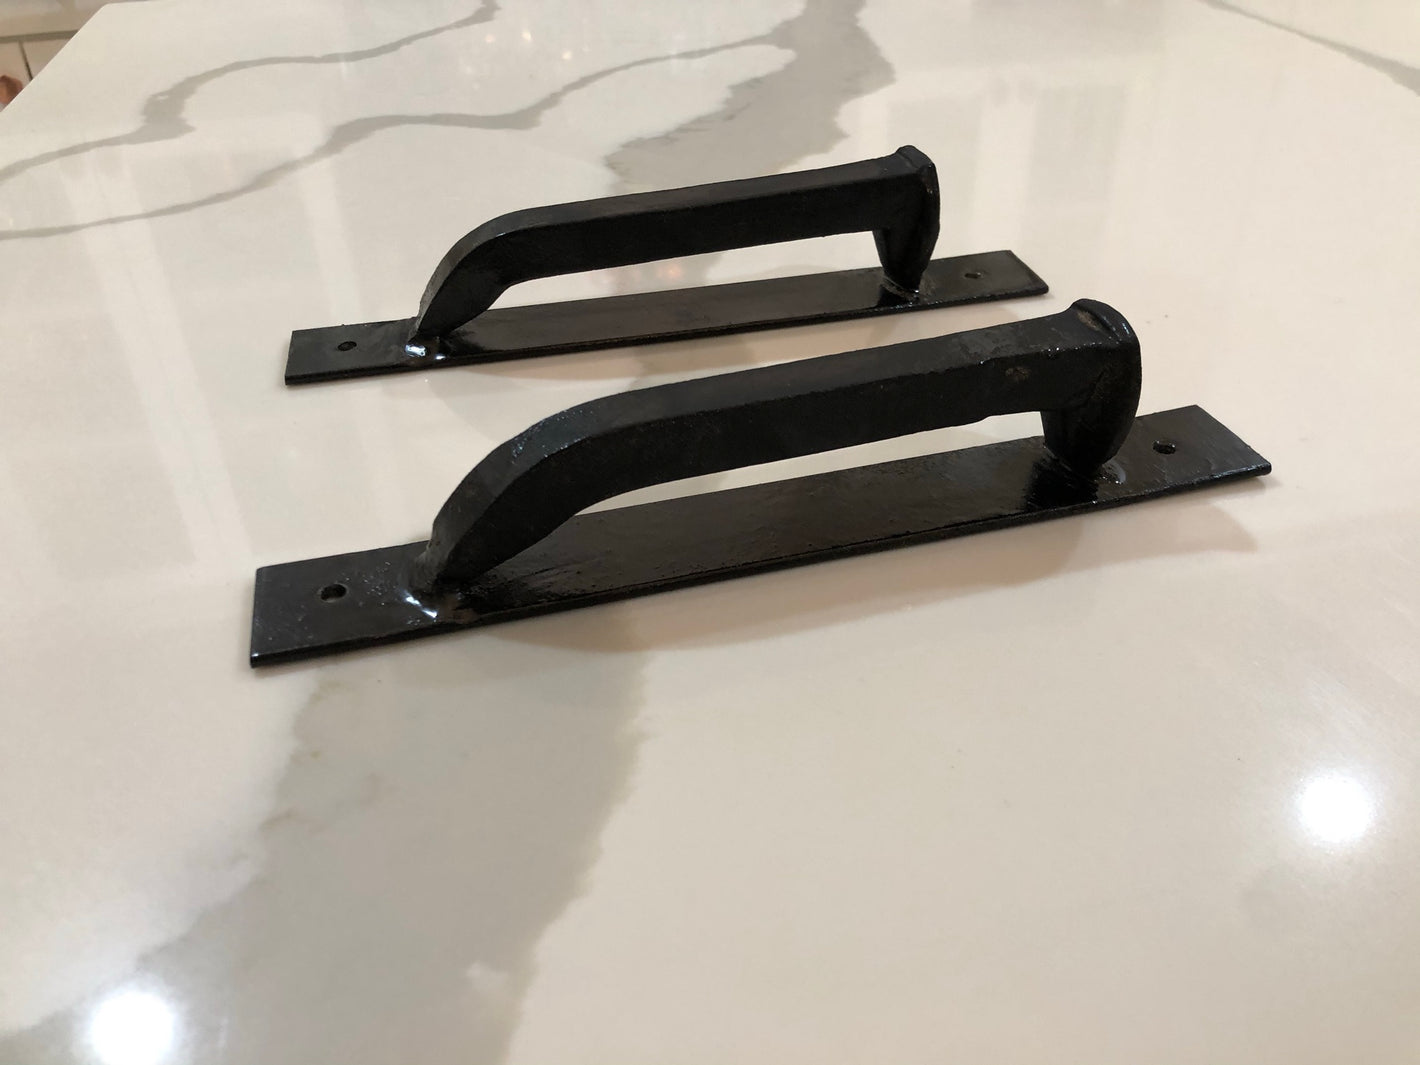
17.) Our personally designed, signature railroad spike handles are then installed.
-

18.) A final layer of beeswax, carnauba wax, mineral oil and vitamen E mix is applied as a finishing touch. The board is now ready for delivery.


